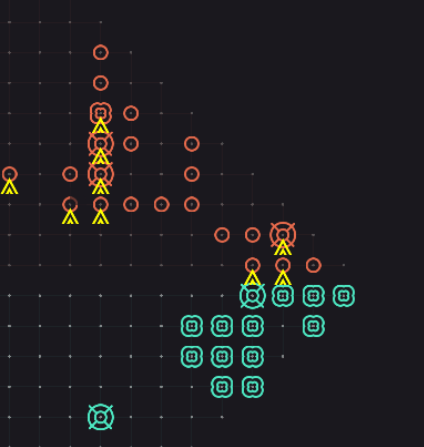
Terminal One
It’s this game where you have to write an algorithm and try to beat others?
https://www.kevinbai.design/terminal-map-maker/
2 Main things to focus on:
- CATCH Error, because the
list_of_locationsis None - Good reactive defense based on where the enemies are destroying our defenses (theoretically shouldn’t happen if we have perfect SD, but check with Andres if I can borrow some of his logic)
- Important that just because enemy deploys on left side doesn’t mean they will attack right side. It might destroy left side
- Build a stronger attack, maybe borrow code from what JR_Hatim wrote
- Add more supports in the event that we are starting to dominate with the structure points
Reconsider some of the changes that were made, reduce the number of turrets?
if attacking_left_only:
	if (self-destruct hits left units when attacking) then:
		rebuild the self-destruct left base
	else:
		dont rebuild
elif attacking_right_only:
	... (opposite of attacking_left)
else:
	normal_build()
Two types of units:
- Mobile Unit (these can only be placed on the edges)
- Can be stacked
- Ping (Scout)
- EMP (Demolisher) → Long range, high damage, but low health (expensive)
- Scrambler (Interceptor) → High health, Only attacks mobile units
- Structure (can be placed anywhere, but don’t move)
- Filter (Wall)
- Encryptor (Support)
- Destructor (Turret)
Game Structure: The game is composed of three phases.
- Restore phase
- Deploy phase
- Action phase
Commands
# To Quickly Test
.\scripts\test_algo_windows.exe .\python-algo

# To run matches locally
scripts\run_match.ps1 python-algo python-algo
py -3 run_match.py
{"debug":{"printMapString":false,"printTStrings":false,"printActStrings":false,"printHitStrings":false,"printPlayerInputStrings":false,"printBotErrors":true,"printPlayerGetHitStrings":false},"unitInformation":[{"iconxScale":0.5,"turnsRequiredToRemove":1,"refundPercentage":0.75,"cost1":0.5,"getHitRadius":0.01,"upgrade":{"iconxScale":0.5,"cost1":1.5,"icon":"S3_filter","iconyScale":0.5,"startHealth":120.0},"unitCategory":0,"display":"Filter","icon":"S3_filter","iconyScale":0.5,"startHealth":12.0,"shorthand":"FF"},{"iconxScale":0.5,"refundPercentage":0.75,"cost1":4.0,"upgrade":{"iconxScale":0.5,"shieldBonusPerY":0.34,"cost1":2.0,"shieldRange":7.0,"shieldPerUnit":2.0,"icon":"S3_encryptor","iconyScale":0.5},"shieldRange":3.5,"shieldPerUnit":3.0,"display":"Encryptor","icon":"S3_encryptor","iconyScale":0.5,"shorthand":"EF","turnsRequiredToRemove":1,"shieldBonusPerY":0.0,"getHitRadius":0.01,"unitCategory":0,"startHealth":30.0,"shieldDecay":0.0},{"iconxScale":0.5,"attackRange":3.5,"refundPercentage":0.75,"cost1":6.0,"upgrade":{"iconxScale":0.5,"attackDamageWalker":32.0,"icon":"S3_destructor","iconyScale":0.5},"display":"Destructor","icon":"S3_destructor","iconyScale":0.5,"shorthand":"DF","attackDamageWalker":16.0,"turnsRequiredToRemove":1,"getHitRadius":0.01,"unitCategory":0,"startHealth":75.0,"attackDamageTower":0.0},{"iconxScale":0.5,"attackRange":3.5,"selfDestructDamageTower":15.0,"cost2":1.0,"metalForBreach":1.0,"display":"Ping","icon":"S3_ping","selfDestructStepsRequired":5,"iconyScale":0.5,"shorthand":"PI","playerBreachDamage":1.0,"speed":1.0,"attackDamageWalker":2.0,"getHitRadius":0.01,"unitCategory":1,"selfDestructDamageWalker":15.0,"startHealth":15.0,"selfDestructRange":1.5,"attackDamageTower":2.0}, {"iconxScale":0.5,"attackRange":4.5,"selfDestructDamageTower":5.0,"cost2":3.0,"metalForBreach":1.0,"display":"EMP","icon":"S3_emp","selfDestructStepsRequired":5,"iconyScale":0.5,"shorthand":"EI","playerBreachDamage":1.0,"speed":1.0,"attackDamageWalker":16.0,"getHitRadius":0.01,"unitCategory":1,"selfDestructDamageWalker":5.0,"startHealth":5.0,"selfDestructRange":1.5,"attackDamageTower":16.0},{"iconxScale":0.5,"attackRange":4.5,"selfDestructDamageTower":0.0,"cost2":1.0,"metalForBreach":1.0,"display":"Scrambler","icon":"S3_scrambler","selfDestructStepsRequired":0,"iconyScale":0.5,"shorthand":"SI","playerBreachDamage":1.0,"speed":0.25,"attackDamageWalker":20.0,"getHitRadius":0.01,"unitCategory":1,"selfDestructDamageWalker":40.0,"startHealth":40.0,"selfDestructRange":9.0,"attackDamageTower":0.0},{"iconxScale":0.5,"display":"Remove","icon":"S3_removal","iconyScale":0.5,"shorthand":"RM"},{"iconxScale":0.5,"display":"Upgrade","icon":"S3_upgrade","iconyScale":0.5,"shorthand":"UP"}],"timingAndReplay":{"playReplaySave":1,"waitTimeBotMax":35000,"waitTimeManual":1820000,"waitForever":false,"playWaitTimeBotSoft":5000,"waitTimeEndGame":3000,"waitTimeBotSoft":5000,"playWaitTimeBotMax":35000,"replaySave":1,"storeBotTimes":true,"waitTimeStartGame":3000},"resources":{"bitsPerRound":5.0,"coresPerRound":5.0,"startingBits":5.0,"turnIntervalForBitCapSchedule":10,"turnIntervalForBitSchedule":10,"bitRampBitCapGrowthRate":5.0,"bitDecayPerRound":0.25,"roundStartBitRamp":10,"bitGrowthRate":1.0,"startingHP":30.0,"startingCores":40.0,"maxBits":150.0},"seasonCompatibilityModeP2":5,"seasonCompatibilityModeP1":5}
Finding the best strategy
Strat: stack as many heals are possible, and just lunch 1 massive attack? Self destruct is not powerful enough at all.
-
self-destruct combined with one of these really good bases, for short game
-
Remove some of the unneeded walls, like the edges?
-
Check where opponent places. At first, use self-destruct on both sides. But if opponent only attacks on one side (check that they do this twice), then just self-destruct on that side. Or check where your things are damaged.
-
Play against myself, check if the self-destruct is OP, or if health boost is even more OP Modifications to Napoleon:
-
Move corner turrets slightly more to the right to have more range
-
Place support in front of turrets. Two main reasons:
- The higher up the supports, the more shield they provide to Mobile units when upgraded
- Upgraded supports costs 6 units, which is the same as a turret. Supports are less expensive, so you can use them as walls for turrets.
-
Come up with a good offensive strategy, which is about waiting out the opponent’s self-destruct by building walls, and sending your offensive.
- If enemy doesn’t have a threatening offense, you can create holes in your base, not use self-destruct for the round, and do a big attack
-
Add logic to “wait out” your opponent, see the effectiveness of the self-destruct. If you need more interceptors, then add them.
-
Don’t upgrade if the structure has less than half health, it is a waste of resources. Instead, place another new structure that has full health.
-
DEFENSE: Add intelligence for defense → More interceptors on one side so that self-destruct damage is bigger
- Always using 4 interceptors every round is a HUGE waste of resources. If you are smarter with the use of these interceptors, you can build up a really aggressive offensive down the center.
Some other thoughts for Napoleon:
- centralize the support, because once you upgrade it, it will have a very long range (giving you more options for attack). If you only put it on the left side, you can only launch an attack.
 Concern: Opponent’s interceptor self-destructs before yours. If you don’t have shield, then it will destroy the interceptor.
Other Observations:
- The timing of the self-destruct for us is EXTREMELY important, it makes or breaks the opponent’s offense. If we self-destruct too early or too late, we don’t get the intended effect.
- We should make our base skew symmetric. If opponent attacks on left side, we defend heavily on our left side, and attack on the right side.
- When you attempt spawn a list, and one of the list items is already spawned, it won’t attempt to spawn the others
- BIGGEST WEAKNESS: Our base is very costly to build.
To predict the opponent’s attack (and better defend): (Andres is working on this)
- see where they place their troops. Also see where their defenses, so you use your self-defense wisely. Also place your health packs better
New Base Idea: Or just copy smite’s base design, and just add this self-destruct idea. It is a counter-offensive strategy. On the rounds you think the opponent is going to attack, you use destructs to defend your base. If you add six heal packs, there is literally nothing your opponent can do.
- So just attack the part of the base that you think is weakest
Like look at us vs D3: They have so much so structure points, if they do one massive attack with all the supports health, then it’s guaranteed to win.
- But i still think our self-destruct strategy has MASSIVE potential, not a lot of the players are doing that. But then also add in the supports at the end, when you want to do an attack. https://terminal.c1games.com/watchLive/10524481
Talked with Andres who spoke about 3 main strategies used.
This might be very naive, but try Adverserial Search?
Season 7: Uses factory, so not really applicable to us. They position them super back.
DOOM CANNON by chaodi, https://www.twitch.tv/videos/738468517 → 08:00
Mazer is great, it has a really solid defense. unfortunately it lost towards the very end because Eagle. Study Mazer, 20:47
21:40: Very nice way the demolisher moves 45:59 and
S6_12: 42:20 → Look at the base change, copy the layout