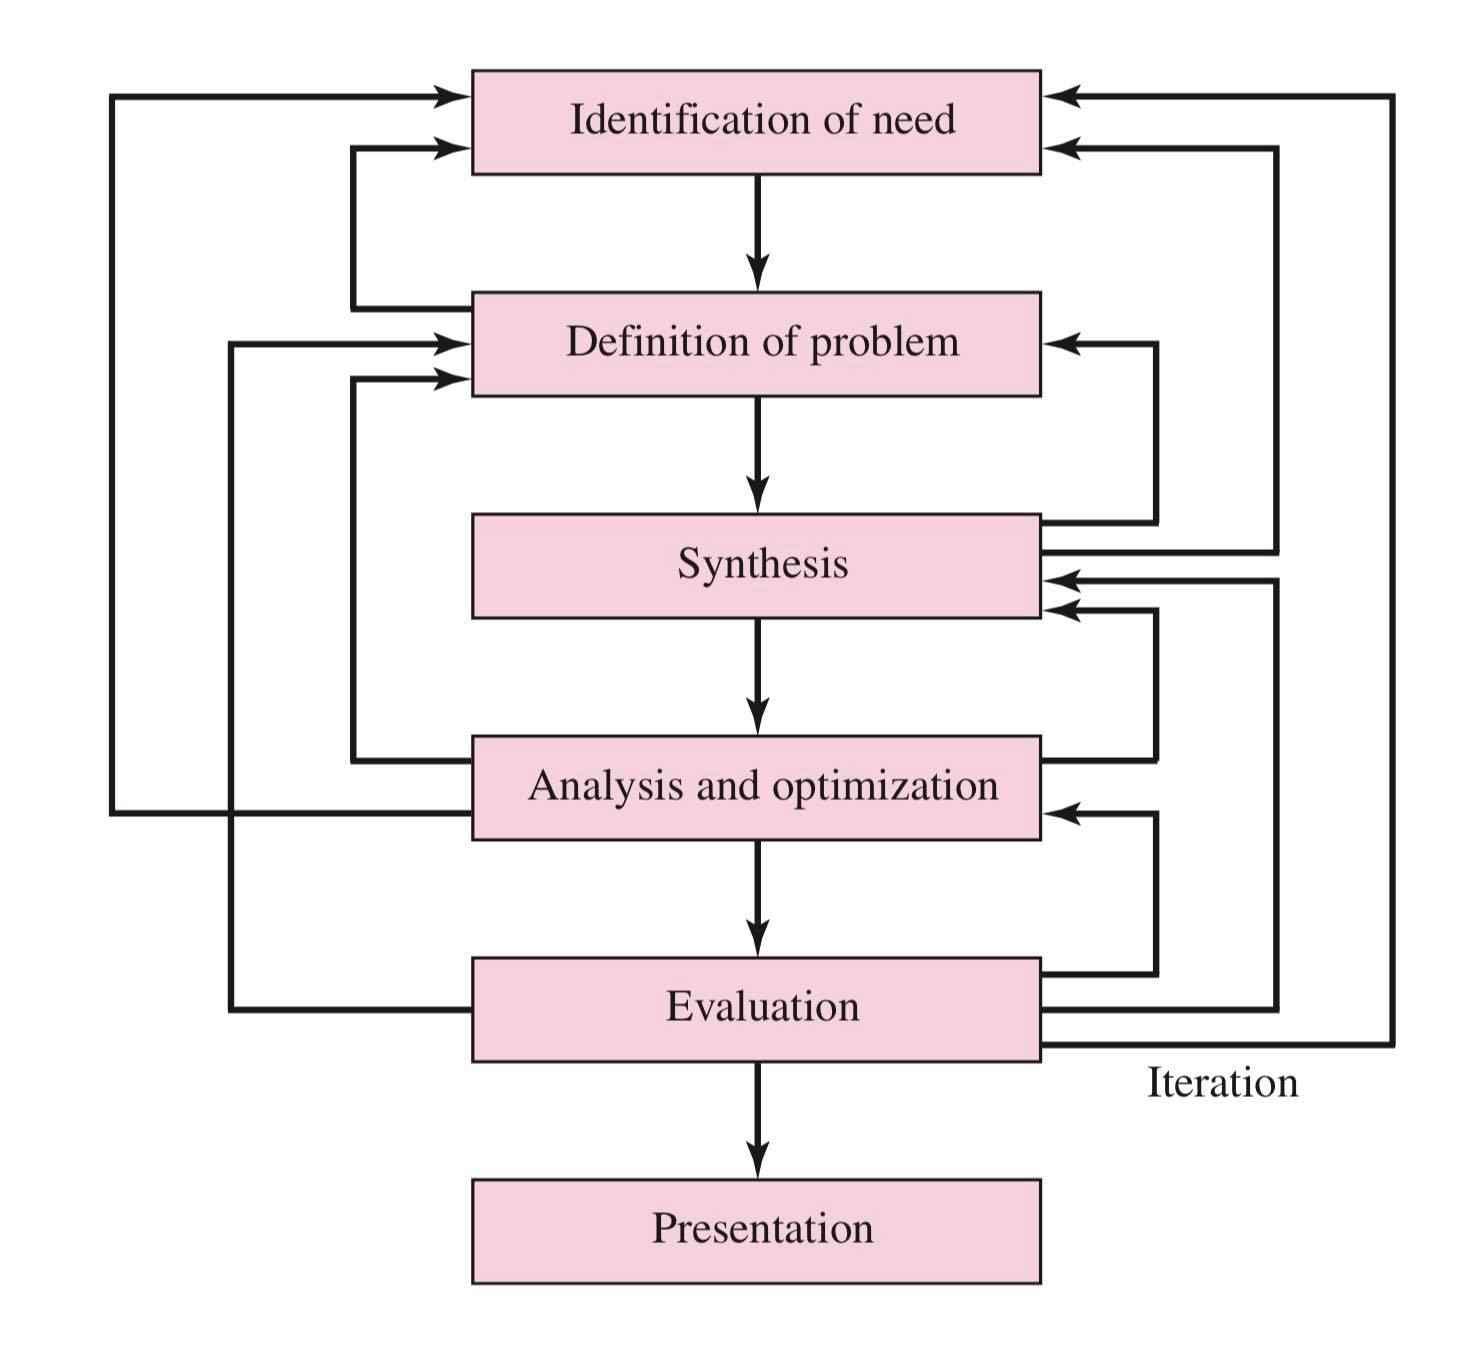
Mechanical Design Process
I need to really get better at this.
Examples of some design documents from great people:
- Tessellator Robot Design Document
- https://docs.google.com/document/d/1XAk-81U9FxX1pZuBMINdUd3iet9ne5hH1th_1VwY4VM/edit by Brian Machado
Project Design Process
Learned from the “Mechanical Engineering for makers” book, the Shigley book, and friends such as Brian Machado, Ethan Childerhorse and Clayton.
The steps below are flexible
Remember that the steps below are not a hard and fast rules. The process can (and should) be quite fluid.
Outline
- Define the project idea
- Define the specifications
- Conceptualize (sketch) the concept
- Perform the research
- Fabricate the project idea
- Test and refine the project idea
1. Define the project idea
What are you are setting out to make? Why do you want to make it? What is the purpose of making this thing?
What do you want to make, and why do you want to make it?
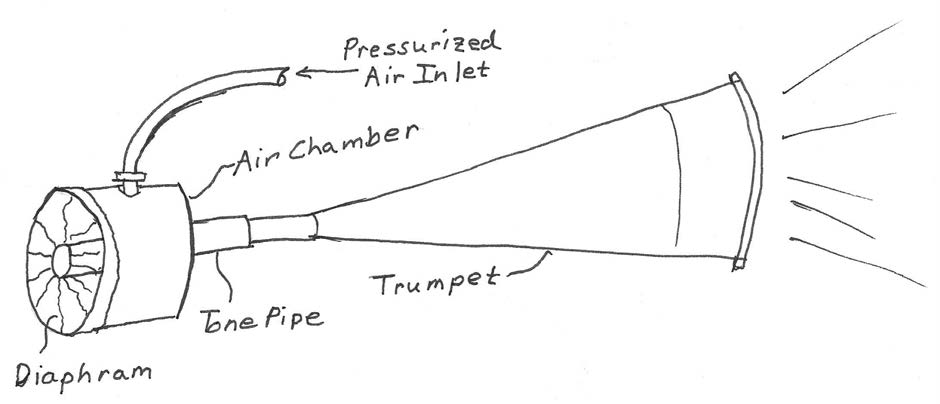
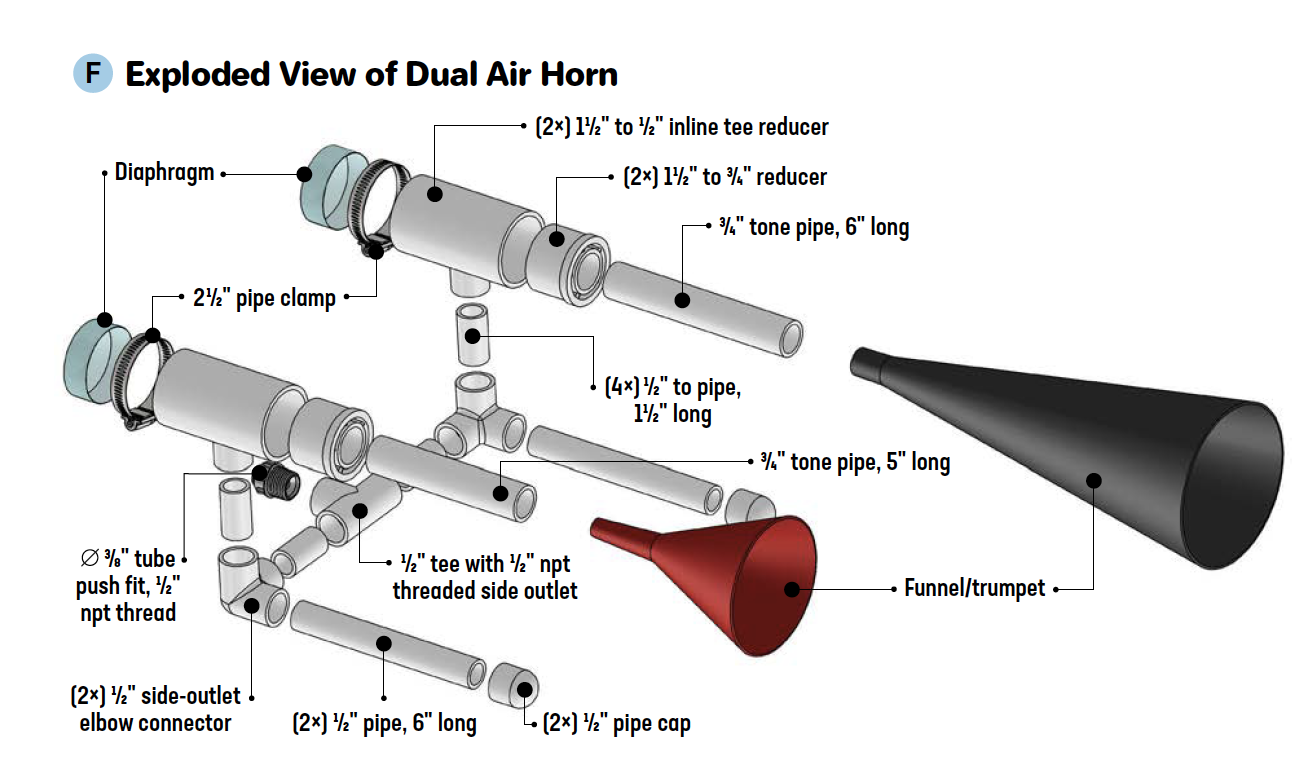
We want to make an Air Horn to illustrate the teachings of this chapter. We also want this project to be fun for you, our readers, to build. As an added bonus, we want to see how loud this thing can be!
2. Define the requirements / specifications
Once you understand the initial idea of the project that you wish to make, you will need to dive deeper into the specific aspects or specifications of the project. Think about what you want your project to do, and how you can make that happen.
What specific things are important about this project?
The Air Horn must be:
- Be inexpensive to build
- Be built from readily available materials
- Be simple to build using common tools
- Be “powered” by a common air mattress pump
- Not take more than a few hours to make
- BE LOUD!
Specifications vs. Requirements?
- requirements = define what a product or system must do
- specifications = define how it will be done
Both requirements and specifications are critical for the successful design and development of engineering products and systems.
There are other terminologies like criteria and constraints.
“As typical with my projects, I start by outlining the requirements, and then derive meaning from them to drive the design. These requirements are generated from what I believe to be the MLP (Minimum Lovable Product), and are mostly based on my personal wants.” - Clayton Height
3. Conceptualize (sketch) the concept
There are multiple levels of sketches that you can do.
- ROUGH SKETCHES: Before building anything, spend time visualizing the project. Sketching helps with forcing ur project-specific thoughts and ideas into a more cohesive and practical object, device or mechanism.
Other things to think about:
- MULTIPLE ANGLES: Drawing the project concept from a number of angles (i.e., points of view) helps you visualize and further refine the idea.
- SUBSYSTEMS: Break a project is broken down into its individual parts, imagine how they all fit together and how they come together
- Help determine things like where Fasteners go, how you drill your holes, get a pre-made part or fabricate it, etc.
-
SCALED DRAWINGS: Once your rough project sketch is complete, take the time to develop your sketch into an actual drawing.
-
DIMENSIONAL DRAWINGS: Do it in 3D. Some guidelines:
- Look for potential areas of obstruction. Ensure moving parts can move freely
- Identify where to put primary fasteners
- (if applicable) picture the person driving or using the object, and see if there is enough room for them to move as needed
4. Perform the research
Some ideas: See what’s already out there
- Confer with others
- Take a walkabout
5. Fabricate the project idea
This, for me, is the hardest part, because I don’t have the background. See page 40 of the Mechanical Design for Makers book for inspiration.
The fabrication process is critical to your design. You must take into account available materials, tools, skills, and time to build your project.
Take the time to fabricate the project in your mind. See yourself cutting the parts, drilling the holes, and tightening the nuts. More than likely, you will find improvements you can make or problems you did not originally foresee.
- It’s no good to design something cool, only to find that you can’t really build it without more advanced tools or manufacturing processes
Scale Modeling
One way to refine a project design is by building a working miniature – this is called scale modeling.
Golden tips
- Limit the number of parts as much as you can
- Limit the number of moving parts as much as you can, since that reduces complexity
- Try to use the same set of parts as often as you can in the project
- Try to use as many off-the-shelf parts as you can (standardized parts and standard lengths/widths of those parts)
- “Measure twice and cut once.” - it is harder to add material than it is to remove material
6. Test and refine the project idea
This is obvious.